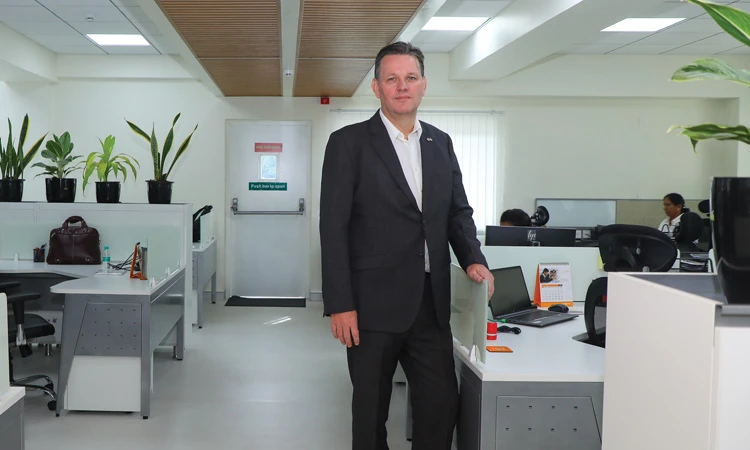
While the Indian D&M industry has a massive potential and so much to look forward, there are some clear challenges in meeting increased production demands and quality standards without losing its cost competitiveness. To capitalize on growth opportunities, the industry needs to adopt technologies and partner with incumbent technology providers to be able to meet future market needs and enhance its capabilities and competitiveness, says Paul Weaver – Director Sales and Marketing – India, Renishaw Metrology Systems Limited. At Die and Mould India, Renishaw will be showcasing its innovative solutions specific to the industry. Visitors will be able to witness the live demonstration of on-machine verification (OMV) using Renishaw technologies and how it’s beneficial compared to the conventional methods of die mould inspection. Excerpts from an interview:
Q. What are the growth prospects of the die mold industry in India, in your view?
India’s die and mold sector has developed over the years and now holds a prominent position in manufacturing. The industry is growing year on year since it can meet a variety of demands from the growing industries including Automotive, Plastics, Electronics and Electrical, Healthcare and Machine Tools.
There is a growing demand for die and molds capable of handling advanced materials, such as high-strength alloys, composites, and plastics with specific properties. Integration of automation, data exchange and smart technologies into manufacturing (Industry4.0) has been a significant trend. This includes the use of IoT, sensors and data analytics to enhance efficiency and quality.
There’s a growing emphasis on sustainable manufacturing practices, including the use of eco-friendly materials, energy-efficient processes, and waste reduction in the die mold industry.
Q. What are the innovative products and solutions you would be showcasing at DIEMOLD?
At Die and Mould India, we will be showcasing our innovative solutions for the die and mould industry. Visitors will be able to witness the live demonstration of on-machine verification (OMV) using Renishaw technologies and how it’s beneficial as compared to the conventional methods of die mould inspection.
Some of the technologies on demo will be Renishaw’s:
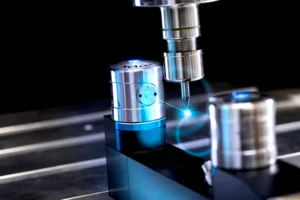
NC4+ Blue – non-contact tool setter for on-machine tool measurement

Featuring industry-first, blue laser technology (patent pending) and improved optics, Renishaw’s NC4+ Blue non-contact tool setting systems deliver significant improvements in tool measurement accuracy, ensuring that components can be machined more accurately and efficiently on CNC machine.
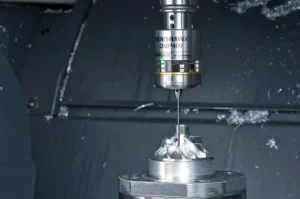
OMP400 high-accuracy machine probe

The OMP400 is an ultra-compact, high-accuracy touch probe that offers all the benefits of automated job set-up as well as the ability to measure complex 3D part geometries on CNC machining centres, including multi-tasking machines. With patented strain gauge technology and interference-resistant optical transmission, the OMP400 provides superior performance found in all Renishaw high-accuracy probes.
Q. How do you maintain your leadership position in the industry?
We work closely with a range of players in this sector with the focus on the development and adoption of automation technologies and help manufacturers achieve even more demanding performance and production targets.
Our metrology products help manufacturers to maximize production output, significantly reduce the time taken to produce and inspect components and keep their machines running reliably. Manufacturers can provide more economical, fast, reliable, and quality dies to the customers so that their customers will produce final component at the earliest and reduce the lead time.
Accuracy and on time delivery of projects are key requirements for the die mould industry. Renishaw solutions help tool makers to save time, money, reduce scrap and achieve a high level of accuracy.
Q. What are the insights and the value propositions you would like to offer to the end customer?
Renishaw’s expertise, technology and products span all levels of manufacturing process control, from products which calibrate and measure machine positioning and motion performance, through systems for machine tool automation and versatile gauging, to co-ordinate measuring systems which give traceable verification of component and feature dimensions. Preventative offers reduce the number of sources of variation before machining starts.
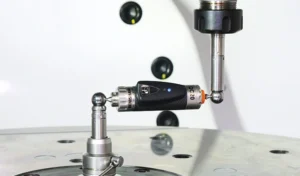
Renishaw Ball bar solution enabling rapid health checkup of machines, reducing downtime losses and rejection rates:

Several times the machining of dies suffers from variation due to positioning accuracy, squareness of axis & interpolation of two axes. Pitch errors also plays a critical role in positioning accuracy of dies. If the machine down time is more, it will result in production delays. The current method includes manual checkup of the machine, which is time consuming as it involves removing cover and fixture. Ballbar will check the health of machine in 10 – 15 mins without having to remove cover & fixture. It highlights issues & appropriate actions are performed to qualify the component.
Process setting offers are applied just before machining starts:
Automatic die alignment – Die alignment by using dial gauge is again a time-consuming process. After die loading probe will take two points on die and will update the angle in plane rotation so that manual alignment process will be eliminated. No need to have skilled manpower for die alignment.
Automatic work offset – It’s a manual process and needs human skill. Also it’s a time-consuming one. But Probe will check dowel reference / corner and will update automatically so that machining will start without manual intervention.
Automatic tool offset – Normally tool updation process is a manual process and customer will update tool by touching to the die. It may lead to variation in wrong entry. Auto tool length & diameter will eliminate all errors. Also, dynamic checking of tool diameter will eliminate errors due to spindle runout & tool wobbling issue.
Tool Profile inspection – It’s only feasible with a high end tool presetter playing a major role in machining 3d profile. Renishaw non-contact NC4 system will provide exact tool radius which will eliminate initial setting errors.
In process controls are active controls (figures below); those are applied during metal cutting. These provide automated and rapid feedback to control metal cutting.
On machine process control solutions controlling thermal variations and reducing rejection rates significantly – Thermal errors have been found to be one of the key reasons for quality issues. Machining of dies is a long process (2Hr – 10 days) and suffer a lot due to large variation in temperature (20 – 48 degrees). This temperature variation causes the axis to expand and impacting the positional accuracy. Majority of machines used in Indian condition are without Ball screw cooling. Use a spindle probe to measure the size of a reference feature in the machine environment and compare it with the known size of that feature at 20 ºC. Probe will check master reference every hour, and compensate the error automatically.
In cycle gauging solutions saving time, improving quality, and enhancing capability – Due to long cycle time, probe will check dimension after rough cut or certain interval so that tool wear correction will be automatically updated in Tool length. Also, this will help to regenerate finishing program.
Tool wear control – Die machining is normally a long cycle & adds errors due to tool wear. Tool probing system will check variation in length after interval of 1Hr and will automatically update in the controller. Also, probe will identify tool wear in profile; will raise an alarm if wear is beyond limit.
Post process controls are applied after machining is completed. They provide confidence in the dimensional conformance of the part.
On Machine verification – Typically molds and dies are large in size and bulky in weight, removing them from machine for verification purposes can introduce a lot of waste in the form of machine downtime, time required to analyze results and make necessary corrections or adjustments, time involved by skilled engineers to carry this operation, etc. This can also introduce errors if parts have to be reloaded again for rework. Renishaw offers solutions to verify these molds and dies by measuring their critical features on machine before unclamping the die from the machine and also produces a detailed report (which is similar to CMM reports. The report consists of comparison of CAD model with respect to actual (X, Y, Z&I, J, K Vector) with deviation details. Otherwise after inspection on outside instrument is very difficult and time consuming as it also involves reloading the die on original work offset.
Q. What are your expectations from DIEMOLD INDIA?
The die and mould India provides a platform for industries to share latest technologies advancements, networking opportunities to facilitate collaborations, partnerships and share the knowledge contributing to the overall growth of the industry.
We are looking forward to connecting with the tool makers and help them in manufacturing the right parts at first time with speed, flexibility and best quality.


